
Nano Banana 2.1 is now documented by Google as an update to Nano Banana 2, with improvements to image generation and conversational editing. Google’s developer page, updated October 6, 2026, lists the stable model ID as gemini-nano-banana-2.1. If you have seen articles describing it as an unconfirmed name in Google Flow, check their dates: the official documentation now provides a firmer basis for understanding the model. For creators, educators, and teams preparing visual explanations, the useful question is what to try first. A sharper image matters, but so do readable labels, controlled revisions, and an explanation that remains faithful to its sources. This guide separates Google’s published updates from a practical workflow you can use to evaluate them.
What changed in Nano Banana 2.1?
Google reports better visual quality at 1K, 2K, and 4K resolutions, improved text rendering and infographic layouts, and fixes for tiling artifacts in certain wide formats. The documentation also describes support for up to 14 reference images, search grounding, and configurable thinking levels. These are published capabilities, rather than results from our own hands-on testing. The changes suggest several useful starting points for evaluation:
| Your task | A useful test | What to inspect |
|---|---|---|
| Explain a process | A diagram with five labeled stages | Stage order, arrow direction, and exact wording |
| Revise a campaign visual | Change the background while preserving the subject | Unrequested changes to shape, colors, and identity |
| Create a teaching graphic | Illustrate one concept from an approved outline | Whether the picture introduces unsupported claims |
| Prepare a wide banner | Use your intended layout and output dimensions | Repetition, edge artifacts, and space for the headline |
Treat each task as an acceptance test. Decide what must stay fixed before generating the image, then compare the result with that brief. This gives you a more useful answer than judging whether the image looks impressive at first glance.
How to access Nano Banana 2.1
Google DeepMind’s current model page links to Gemini and Google AI Studio and introduces Nano Banana 2.1 as an upgrade for visual design, editing, and subject consistency. Start from those official entry points, then confirm the model shown in your account. A product page describing the model does not establish the access, limits, or charges for every account.
For developers, use the model identifier in Google’s documentation and check the current integration guidance before switching an application. For a third-party image tool, look for a clear statement identifying the underlying model. A familiar marketing name alone is insufficient to establish which model produced your image.
Before a large project, run one small task through the complete workflow: provide the brief, generate, revise, download, and inspect the final file. Confirm the settings and charges displayed in the service you actually use. This article does not establish a universal free allowance or a fixed price.
Build the explanation before generating the visual
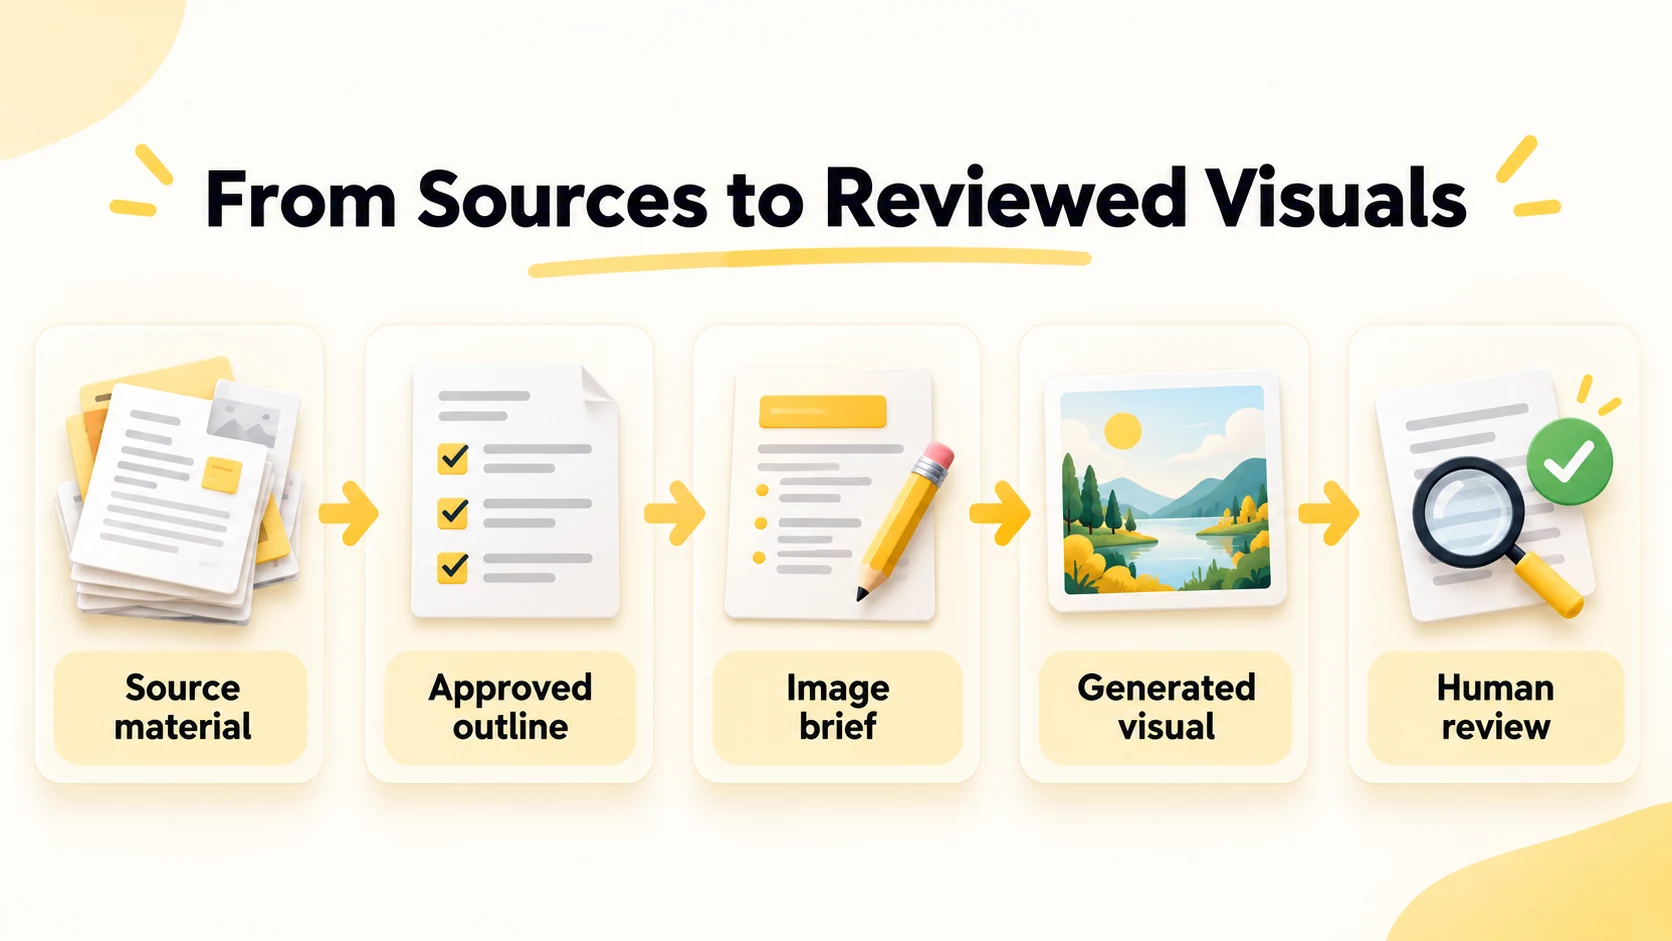
iWeaver’s Text Summarizer can help extract key points from supplied text and organize them into an outline. For longer source files, the AI Document Summarizer provides a document-focused starting point. Check the resulting notes against the original material before using them in a visual.
Step 1: Create a source-based brief
Choose one question the image should answer. Extract only the facts needed to answer it, preserve their units and dates, and separate source claims from your interpretation. Ask for a short outline that includes uncertainties rather than silently filling gaps.
For example, a briefing graphic might contain one headline, three findings, and a qualification. Keep a source reference beside each finding in your working notes. Those references make later corrections easier, even if the final graphic uses a shorter source line.
Step 2: Give the image model exact instructions
Supply approved wording and explain the visual hierarchy. State what can change and what must remain fixed, especially when editing an existing image. The following is an illustrative prompt template, not a tested model output:
Create a landscape infographic for a team briefing using only the facts below. Use one headline and three panels. Reproduce the supplied labels exactly. Do not add statistics, logos, or new factual claims. Keep the layout spacious and reserve a footer for the source. Facts: [approved facts]. Labels: [exact wording]. Source footer: [source and date].
Start with a modest amount of text. If the explanation needs several paragraphs, place the detailed explanation in the accompanying article or slide notes and keep the graphic focused on the relationships readers need to see.
Step 3: Review meaning before appearance
Compare every label and number with the approved outline. Then check whether arrows, relative sizes, and placement imply something the source did not establish. A diagram can contain correct words and still communicate the wrong relationship.
Only after that review should you adjust color, spacing, and style. Request a specific revision and inspect the whole image again, including areas you did not ask to change. Save the approved outline alongside the final asset so future updates have a reliable starting point.
What still needs human review?
Google’s model card acknowledges limitations including small or lengthy text, imperfect character consistency, spatial confusion, and factuality. It also describes possible hallucinations and occasional delays or timeouts. These limitations are especially relevant when an image is meant to teach, summarize evidence, or represent a product accurately.
Review at the size your audience will actually see. A label readable when zoomed in may fail on a phone, and a plausible illustration may conceal an incorrect detail. Use the original source as the authority when the generated visual and the source disagree.
Should you try Nano Banana 2.1?
Choose one real visual task with clear requirements and compare the result with your current workflow. Record what needed correction, which revisions preserved the important details, and whether the finished file worked in its intended placement. This will tell you more about its value for your work than a broad claim that one model is better at everything.
For research-based visuals, begin with information you can verify. Use iWeaver to help structure the source material, approve the brief, and then bring it to your chosen image tool. The final review should cover both the picture and the explanation it communicates.